Sublimation with Cricut is an excellent way to personalize items that are not possible with normal printing. Yes, you read it right! This innovative technique allows you to effortlessly transfer high-resolution designs onto various surfaces like fabrics, mugs, metal, vinyl, etc. The best part? It’s the perfect starting point for beginners.
This simple way has been a game-changing technique for me, and I said goodbye to complex cutting and layering. With the help of Cricut’s Design Space, Cricut Explore Air 2, and Cricut EasyPress, I’ve created professional-looking products just at home!
Here, I’ll show you how to do sublimation with Cricut in the easiest way possible. I’ll walk you through the basics, including how to prepare your design, print your design, cut your design, and heat transfer your design onto a substrate.
Cricut is a game-changing brand that has revolutionized crafting and DIY projects. With its precise cutting machines and user-friendly software, Cricut offers a world of creative possibilities.
When combined with sublimation, Cricut becomes an invaluable tool for crafting stunning designs on various materials like sublimation paper and heat transfer vinyl. The precision cutting ensures professional-quality results, making it easy to create personalized apparel, home decor, and gifts with ease.
How to Sublimate with Cricut
If you are eager to elevate your crafting game and create mesmerizing designs, sublimation with Cricut is about to become your new favorite technique – and trust me, it’s worth every moment of excitement.
Let me share my personal experience and insights on sublimation with Cricut – an incredible crafting technique that has taken my projects to a whole new level.
Materials and Supplies
Here’s a list of the materials required for sublimation with Cricut:
Sublimation Printer
Sublimation Ink
Sublimation Paper
Cricut Cutting Machine (Preferably Explore Air 2)
Cricut Heat Press (I use EasyPress)
Sublimation Blank
Protective Paper
Lint Roller
Heat Resistant Tape
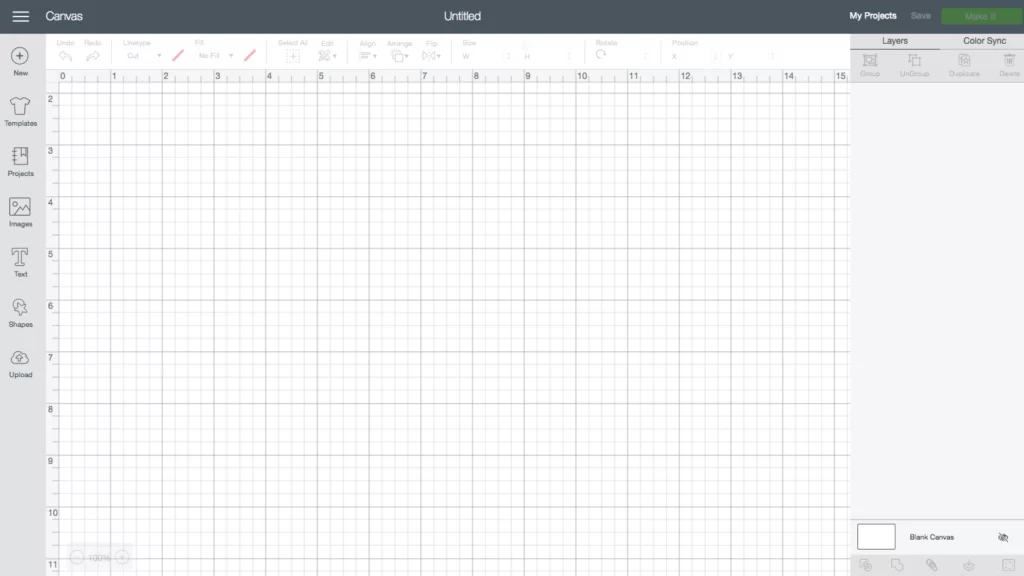
Designing for Sublimation with Cricut Design Space
Sublimation is a great way to customize your belongings, but it’s important to design your projects carefully. If you are not sure where to start, Cricut Design Space is a great option. It’s a free software program that allows you to create and print sublimation designs.
Have you just heard of the Cricut design software and are not sure what is it and what it can do? Let me break it down for you:
What is Cricut Design Software?
Cricut Design Space is the design software developed by Cricut, a leading brand in the world of cutting machines and crafting tools.
This intuitive and user-friendly software serves as the creative hub for Cricut users, providing a seamless experience for designing, cutting, and crafting a wide range of projects. Cricut Design Space offers a wealth of tools and features to bring your creative visions to life.
Key Features
Design Flexibility: Cricut Design Space offers a vast library of ready-to-use images, fonts, and designs that users can access for free or purchase.
Additionally, it allows users to upload their custom designs, giving them the freedom to create truly unique and personalized projects.
User Interface: The software boasts a clean and straightforward interface, making it accessible to both beginners and experienced designers. Navigating through the various design tools and features is easy, ensuring a smooth workflow for crafting enthusiasts of all skill levels.
Easy-to-Use Tools: Cricut Design Space provides an array of design tools, including text editing, image manipulation, and shape creation. These tools empower users to customize their designs precisely to their preferences, whether they’re creating intricate patterns or simple shapes.
Wireless Connectivity: This amazing software allows for wireless communication between the software and compatible Cricut cutting machines, eliminating the need for physical connections and simplifying the cutting process.
Project Organization: The software offers a project-saving feature, enabling users to save their designs and revisit them later. This organization feature helps users manage and work on multiple projects at their own pace.
Collaboration and Sharing: Cricut Design Space allows users to share their designs with others, fostering a sense of community and collaboration among crafting enthusiasts. Users can also access a library of shared designs by other creators, providing endless sources of inspiration.
Mobile App Integration: Cricut Design Space has a mobile app that syncs with the desktop version. This allows users to design and cut projects on the go, providing added convenience and flexibility.
Now, let me take you through the detailed step-by-step process, based on my personal experience, so you too can immerse yourself in the enchanting world of sublimation with Cricut.
Step 1: Designing Your Artwork
The first step is to create your unique design in Cricut Design Space. As the heart of your sublimation project, this is where your creativity comes to life. Whether you are designing personalized mugs, vibrant apparel, or charming home decor, the possibilities are limitless.
Use Cricut Design Space’s intuitive tools to arrange, resize, and customize your elements. Add text in a variety of fonts to give your design a personal touch.
I prefer designing the image in RGB colors. Once your masterpiece is complete, save your design to continue to the next step.
Step 2: Printing Your Design
Now that your design is ready, it’s time to bring it to life through printing. For sublimation printing, ensure you are using a dedicated sublimation printer and sublimation ink.
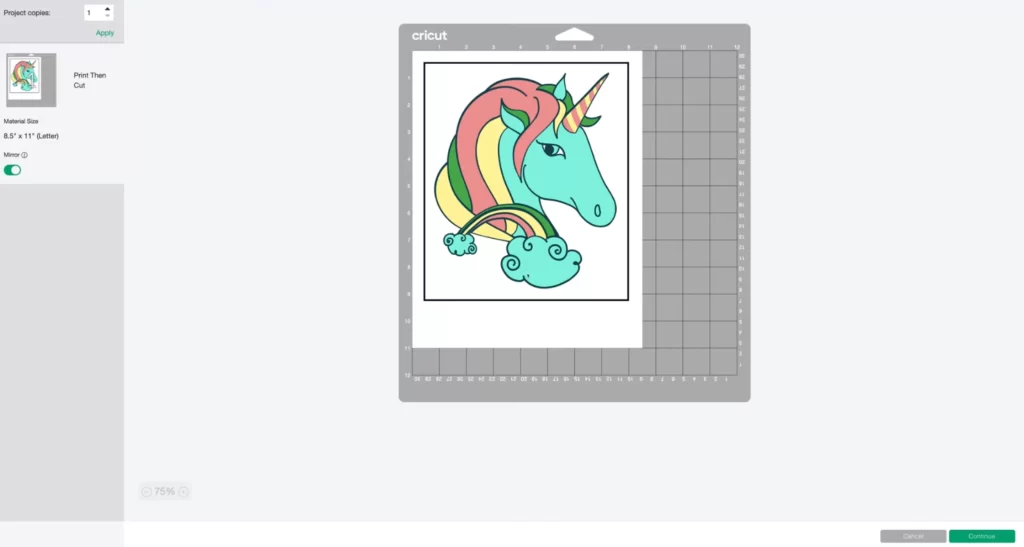
Load the sublimation paper into your printer and print your design in mirror view. This specialized paper is crucial for holding the sublimation ink during the transfer process.
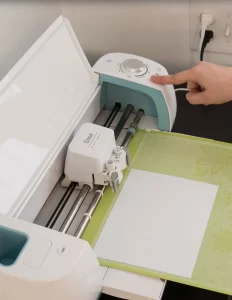
Step 3: Cutting Your Design with a Cricut
Load the printed sublimation paper onto your Cricut cutting machine’s mat. Ensure that the material is firmly secured and properly aligned on the scale sheet.
Connect your Cricut machine to your computer or mobile device and select the appropriate settings for cutting. Follow the prompts in Cricut Design Space to initiate the cutting process.
The machine will precisely cut out your design, giving it a professional and polished look.
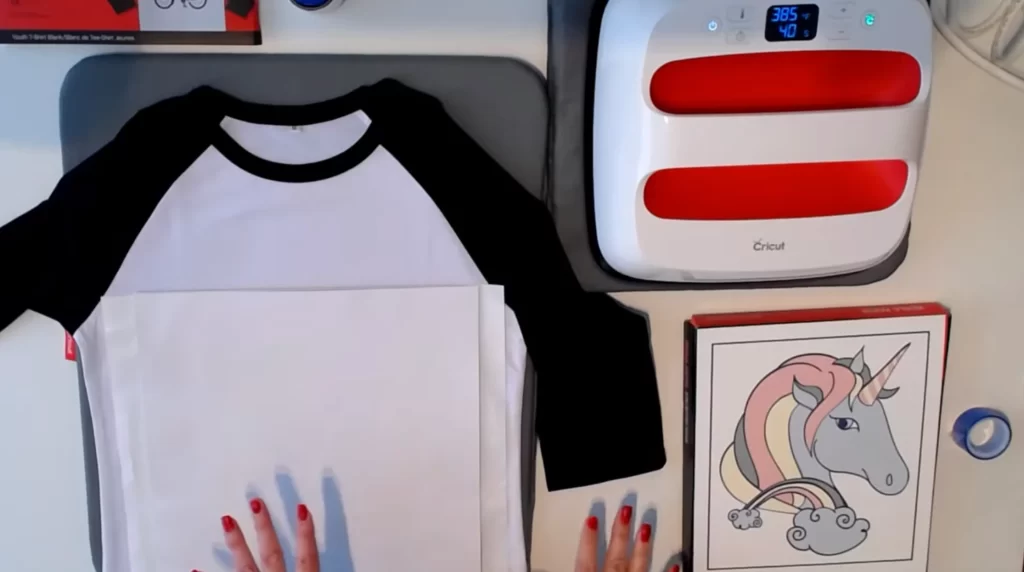
Step 4: Preparing Your Sublimation Blank
Choose the substrate or sublimation blank you want to apply your design to. Popular choices are t-shirts, mugs, vinyl coasters, and more. Ensure your chosen blank is clean and free from any dirt or debris that may affect the transfer.
For apparel, pre-press the garment for about 10 seconds at 190°F to eliminate moisture and wrinkles, ensuring a smooth transfer.
Step 5: Transferring Your Design
Place your cut design onto the sublimation blank with the printed design face down, ensuring it is properly positioned and aligned. I prefer using heat-resistant tape to secure the paper in place, and I’ll recommend you do so.
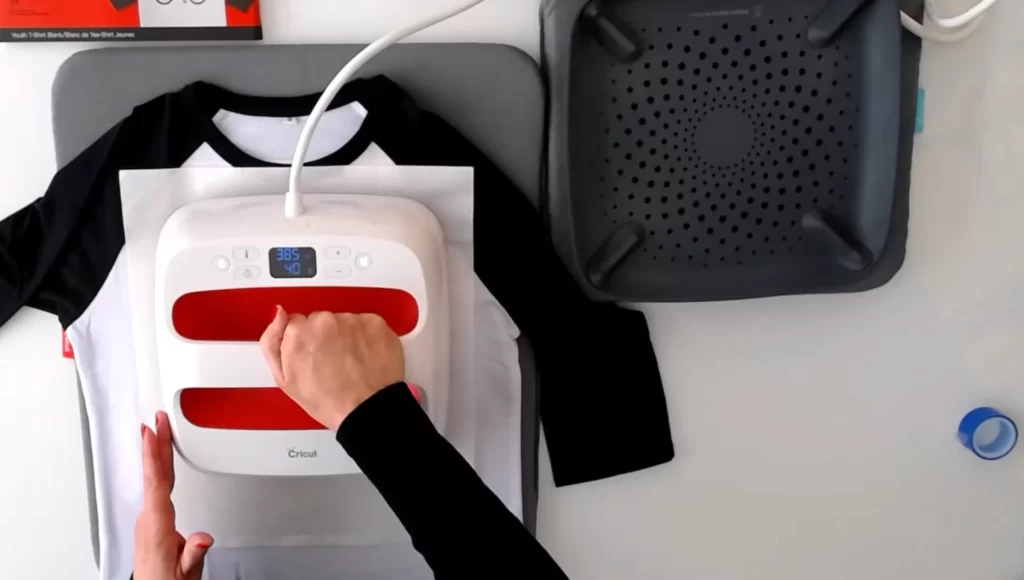
Preheat your Cricut heat press machine to 385°F temperature. Once heated, carefully place the sublimation blank with the design onto the lower plate of the heat press. Close the heat press and apply even pressure for about 45 seconds.
The heat and pressure will activate the sublimation process, causing the ink to transfer onto the blank.
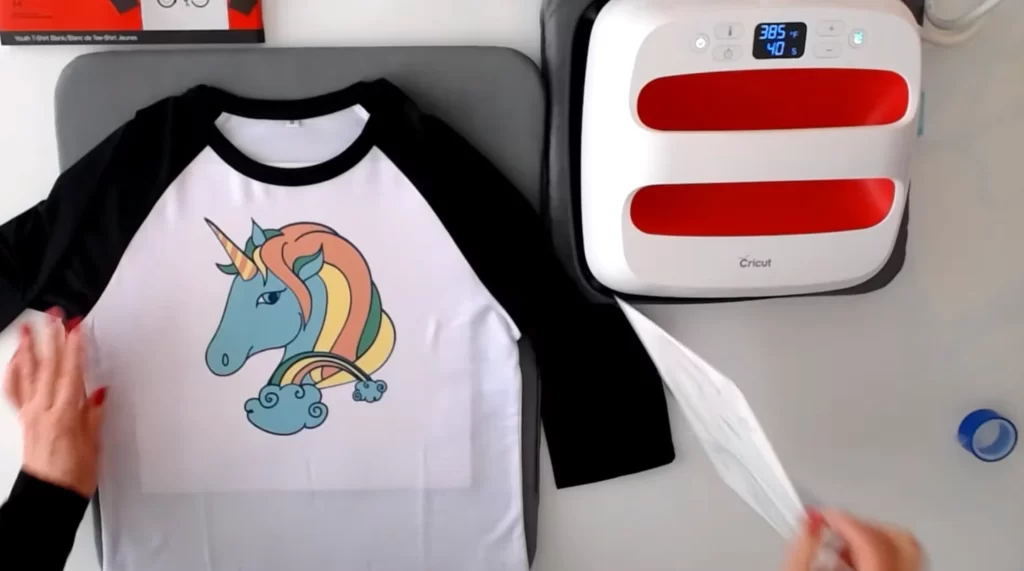
Step 6: Revealing Your Sublimated Creation
Once the heat press timer finishes, carefully lift the press to reveal your sublimated masterpiece. Be cautious, as both the blank and the paper will be hot.
Remove the heat-resistant tape and sublimation paper, revealing your stunning, professional-quality design on the blank. Your creation is now ready to be shown off and cherished.
Video Guide on Sublimation with Cricut
How to Print Large Sublimation Images on Cricut?
Printing large sublimation images requires careful attention to ensure optimal results. Start by checking the maximum printing dimensions of your sublimation printer. For example, if it can print up to 13″ x 19″, adjust your design in Cricut Design Space to fit within these dimensions.
Next, select the correct sublimation paper size to match your printer and design. Use high-quality sublimation paper to achieve vibrant and precise prints.
Ensure that the sublimation ink is loaded correctly, and your printer is calibrated for accurate color reproduction.
Tips and Tricks for Sublimation with Cricut
Excited to know how to make your sublimation with Cricut brighter and more vibrant? Let me share some valuable tips and tricks that have truly taken my sublimation game with Cricut to the next level.
Temperature: The ideal heat press temperature for sublimation is typically between 385°F to 400°F (196°C to 204°C).
Time: The recommended heat press time for sublimation varies based on the substrate, but it usually falls between 45 to 60 seconds.
Pressure: Use medium to heavy pressure on your Cricut heat press for the best sublimation results. Ensure that the heat press is evenly pressing down on the entire design area.
Pre-Press Your Materials: Before transferring your design, pre-press the material (especially garments) to eliminate moisture and wrinkles. This ensures even sublimation and improves the durability of the final product.
Mirror Your Designs: Always remember to mirror your designs before printing. Sublimation transfers the image in reverse, so mirroring prevents any text or graphics from appearing backward on your substrate.
Testing: Always perform a test print and transfer on a small piece of the same substrate before applying the design to the final product. This way, you can adjust the time, temperature, and pressure if needed.
Heat-Resistant Tape: Secure the sublimation paper to your substrate using heat-resistant tape. This prevents any movement during the heat press process and ensures a clean transfer.
Can You Cut the Sublimation Paper with Cricut?
Absolutely, you can cut definitely cut sublimation paper with a Cricut machine. I’ve been through the same curious phase when I started with sublimation and Cricut.
Cutting sublimation paper with your Cricut is entirely feasible and opens up a world of creative possibilities. However, there are a few essential recommendations and precautions to ensure successful cutting:
Recommendations
Use a fine-point blade for cutting sublimation paper. A sharp will provide detailed cuts, ensuring clean and precise edges.
Place the sublimation paper on a Cricut sticky mat to prevent movement during cutting. The sticky surface will keep the paper securely in place for clean cuts.
In Cricut Design Space, select the appropriate material setting for the sublimation paper. It’s crucial to have the right settings to achieve the best results.
Precautions
Be mindful of back-cutting, which occurs when the blade lifts and drags the paper backward, potentially damaging your design. To avoid this, make sure your blade and mat are clean and in good condition.
Before cutting a full design, perform a test cut on a small piece of sublimation paper to ensure the settings are correct and avoid wasting your material.
Final Words
So, we have seen that sublimation with Cricut is a great technique to customize various products, be it a fabric of any type and color, ceramic or porcelain mugs, metal or glass tumblers, vinyl, etc. The Cricut Design Space opens up a world of creative possibilities for crafters and DIY enthusiasts.
From designing and printing to transferring your designs onto various substrates, the process of sublimation with Cricut is made easy and accessible. With the right materials, precise cutting using a Cricut machine, and the application of heat using a Cricut heat press, you can achieve vibrant, durable, and personalized creations that will amaze you.
Frequently Asked Questions
What is needed for sublimation with Cricut?
To get started with sublimation using your Cricut, you’ll need a few essential materials:
Sublimation Printer
Sublimation Ink
Sublimation Paper
Cricut Cutting Machine
Heat Press
Sublimation Blanks
Heat-Resistant Tape
Lint Roller
Protective Paper
Can I use my Cricut Maker for sublimation?
Yes, you can use your Cricut Maker for sublimation projects. The Cricut Maker is fully capable of cutting sublimation paper and various other materials, making it a versatile tool for your crafting needs.
Simply load the appropriate sublimation paper onto your Cricut Maker’s cutting mat, adjust the settings in Cricut Design Space, and let the machine work its magic!
Do you need a Cricut for sublimation printing?
While a Cricut machine is not mandatory for sublimation printing, it certainly enhances the creative process and provides additional design possibilities. With a Cricut cutting machine, you can precisely cut intricate designs, text, and shapes, ensuring professional and polished results.
However, if you already have pre-cut sublimation designs or plan to apply sublimation using other methods, a Cricut machine is not an absolute requirement.
Is it necessary to use a heat press for sublimation with Cricut?
Yes, a heat press is essential for sublimation with Cricut or without Cricut. The sublimation process requires both heat and pressure to transfer the design onto the material.
While other heat sources like an iron might work for small projects, a heat press provides consistent, even heat distribution, ensuring vibrant and long-lasting results.
Can I wash sublimated items created with Cricut?
Yes! Sublimation creates permanent designs that are durable and washable. You can confidently launder sublimated items without worrying about the design fading or peeling off.
My passion for colors and customizing items has led me to sublimation printing. Not only do I personalize my belongings, but also run a profitable business. After the experience of over a decade - I am glad to share my reviews on best sublimation printers, ink and the right software (I use). Read the guides and contact if you need any help regarding dye-sublimation or heat press.


 Load the printed sublimation paper onto your Cricut cutting machine’s mat. Ensure that the material is firmly secured and properly aligned on the scale sheet.
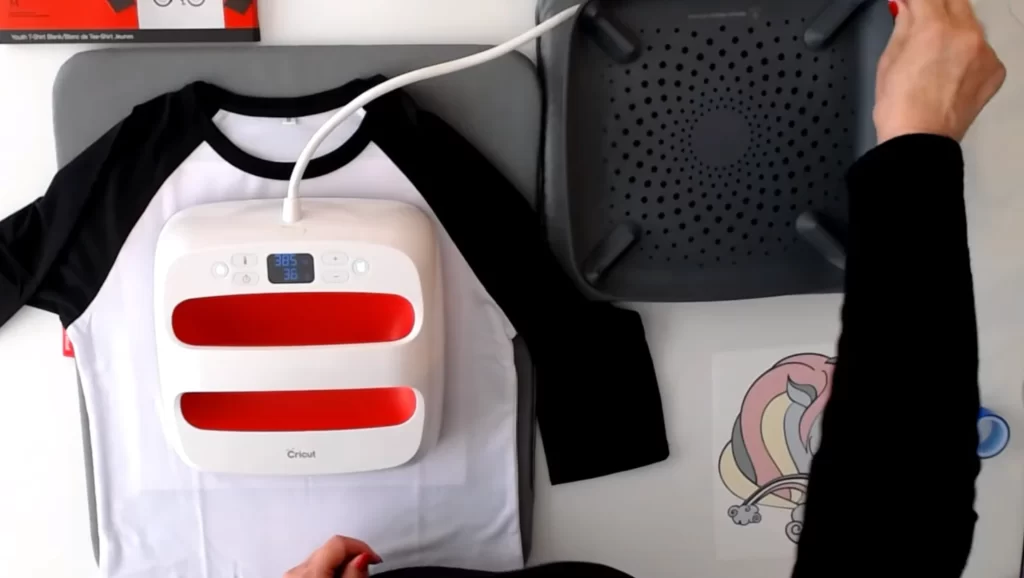


")


