I’ve been doing sublimation printing for a few years now, and I’ve learned a lot about what works and what doesn’t. One of the most important things is getting a good sublimation printer (I prefer Epson) and its settings right.
Achieving the best results in sublimation printing goes beyond just having the right equipment. Proper printer settings play a crucial role in unlocking the full potential of this technology. If you don’t, you’ll end up with washed-out colors, blurry images, or even worse.
Epson printers have gained a reputation for their exceptional performance in sublimation. These versatile machines offer a range of features specifically designed to enhance the sublimation printing process. From the precision of color management to the flexibility of print customization, Epson printers have become a go-to option for sublimation enthusiasts.
Their advanced features like ICC Profiles and precise control make them an ideal choice for sublimation projects. Here, we will explore the importance of Epson printer settings for sublimation and see how crucial are they for achieving outstanding results.
When it comes to sublimation printing, selecting the right Epson printer is a crucial first step. However, understanding which Epson printer models are compatible with sublimation can be a bit overwhelming, especially if you are new to the world of sublimation printing.
So, how do you navigate the options and find the right Epson printer for your sublimation projects?
a. Evaluating Epson Printer Models for Sublimation Compatibility
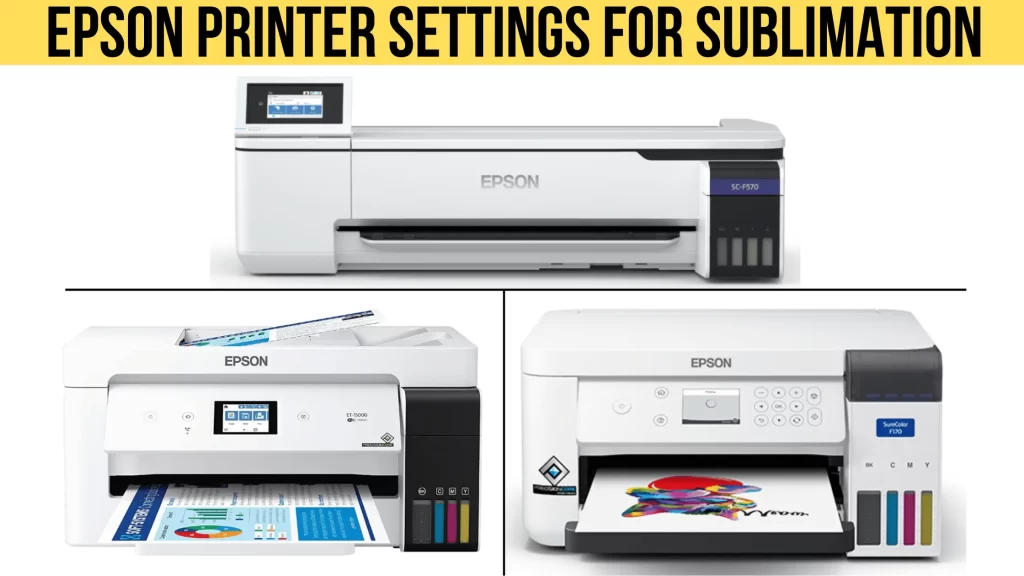
Firstly, it’s essential to assess the compatibility of Epson printer models with sublimation printing. Among the popular choices are Epson 2720, 2760, 2800, 2850, 4800, ET-15000, and 7210. I have personally done quite a lot of sublimation using these models and found them extremely efficient at providing great results.
b. Key Features to Consider
Certain key features should be on your radar when selecting an Epson printer for sublimation.
Make sure that the printer you choose has a print head that is compatible with sublimation ink.
Look for printers that offer high resolution, preferably 1440 dpi or higher, to ensure sharp and vibrant prints.
A wide color range capability is also crucial to accurately reproducing a broad range of colors in your designs.
If you plan on sublimating a lot of products, you’ll want a printer that is fast. Look for a printer that can print at least 15 pages per minute.
c. Comparing Printer Options
Entry-level Epson models, such as the Epson 2720, are affordable choices for beginners or those on a budget. They provide reliable performance and sufficient features for small-scale sublimation projects.
On the other hand, professional-grade models like the Epson 7210 and Epson ET-15000 offer advanced capabilities and greater precision, making them suitable for larger and more demanding sublimation printing endeavors.
Setting Up Your Epson Printer for Sublimation Printing
When it comes to sublimation printing, properly setting up your Epson printer is the only way to achieve excellent results. Having personally gone through the process, I understand that it can be a bit confusing if you are new to it.
But fear not – I’m here to guide you through the steps from my personal experience to setup up your Epson printer for sublimation printing.
1. Preparing the Printer for Sublimation Ink Installation
Before you install sublimation ink cartridges in your Epson printer, you need to prepare the printer by running a few maintenance cycles. This will help to clear out any residual ink and ensure that the printer is ready for sublimation ink.
To prepare your printer, follow these steps:
Run the Print Head Cleaning cycle.
Run the Nozzle Check cycle.
Make sure the printer is clean.
Wipe the printhead and clean the cartridge area.
Run the Print Head Alignment cycle.
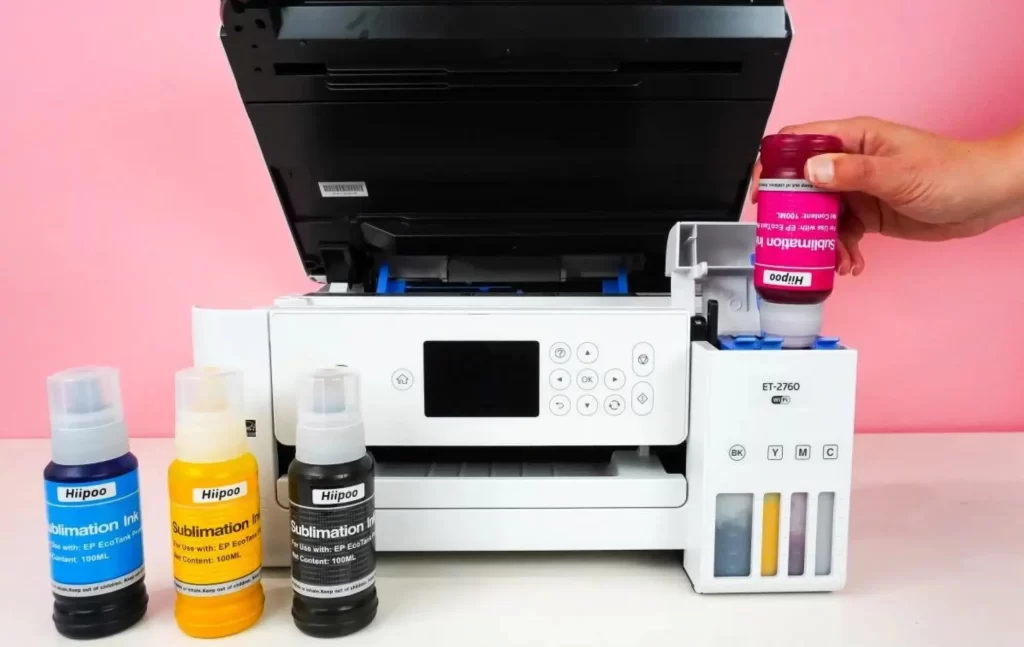
2. Installing Sublimation Ink Cartridges in Your Epson Printer
Once you’ve prepared the printer, you can now install the sublimation ink cartridges. Sublimation ink cartridges are different from regular ink cartridges, so make sure that you are installing the correct cartridges.
To install sublimation ink cartridges in an Epson printer, follow these steps:
Turn off the printer.
Open the printer ink cartridge door.
Remove the old ink cartridges.
Insert the sublimation ink cartridges.
Close the printer ink cartridge door.
Turn on the printer.
3. Ensuring Proper Ink Flow and Preventing Clogging Issues
Maintaining a consistent ink flow is crucial for sublimation printing. Make sure that your ink cartridges are properly seated and securely installed.
It’s also recommended to perform regular printhead cleaning routines to prevent clogging issues that can affect print quality. This can be done through the printer’s maintenance menu or software.
To ensure that the ink is flowing properly, follow these steps:
Print a test page.
Check the ink levels.
Run the “Print Head Cleaning” cycle if necessary.
Epson Printer Settings for Sublimation Printing
Let’s break it down into simple steps, ensuring that your printer is ready for sublimation printing.
1. Installing the Necessary Printer Drivers
Begin by installing the latest printer drivers and software provided by Epson. These drivers enable seamless communication between your computer and the printer, ensuring smooth and accurate printing operations.
Visit the official Epson website or use the installation CD that came with your printer to download and install the appropriate drivers for your printer model.
2. Configuring Printer Settings for Optimal Sublimation Output
Once the drivers and software are installed, it’s time to configure the printer settings for optimal sublimation printing. Pay close attention to the following key settings:
a. Paper Size and Type Selection
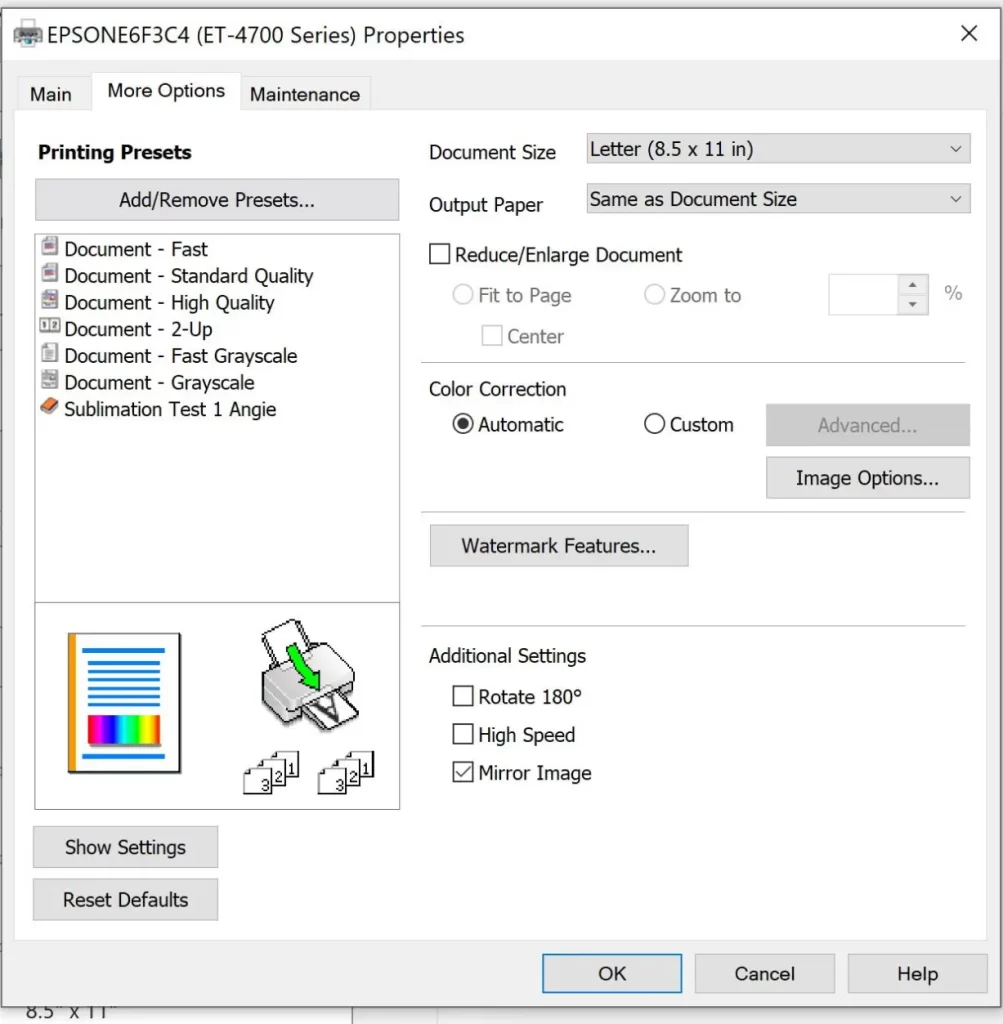
Choose the appropriate paper size and type settings in the printer menu. Select the correct sublimation paper size and ensure it matches the dimensions of your design for accurate printing. And, most important step – do not forget to select “Mirror Image” before printing. Read why do you have to mirror sublimation images.
b. Print Quality Settings for Sublimation
Adjust the print quality settings to achieve the desired level of sharpness and detail in your sublimation prints. Higher print quality options often result in more vibrant and precise output.
c. Color Management and ICC Profiles
An ICC (International Color Consortium) profile is a standardized file format that defines the color characteristics of a device, such as a printer, monitor, or camera. It acts as a translation dictionary between different devices, ensuring accurate color reproduction and consistency across various platforms.
ICC profiles contain information about the device’s color range (the range of colors it can produce), color temperature, gamma, and other color-related parameters. They provide a mapping between the device’s native color space and a standardized reference color space, such as sRGB or Adobe RGB.
In the context of sublimation printing with an Epson printer, using ICC profiles specific to your sublimation ink and the paper combination can help achieve consistent and accurate color reproduction.
These profiles ensure that the colors you see on your screen closely match the final printed output, enhancing the overall quality of your sublimation prints.
d. Ink Density and Saturation Adjustments
Fine-tune the ink density and saturation settings to achieve the desired level of color vibrancy and depth in your sublimation prints. Adjust these settings based on the specific requirements of your designs.
However, be cautious not to oversaturate the colors, as it may result in bleeding or color inaccuracies.
e. Soft Proofing and Color Calibration
Implement soft proofing techniques and perform regular color calibration to ensure consistency between the colors you see on your screen and the final prints.
Soft proofing allows you to preview how the colors will appear on different media types.
Epson Printer Settings for Sublimation in Word
When using an Epson printer for sublimation printing in Microsoft Word, you should configure both the printer and the document settings properly. Here are the recommended settings:
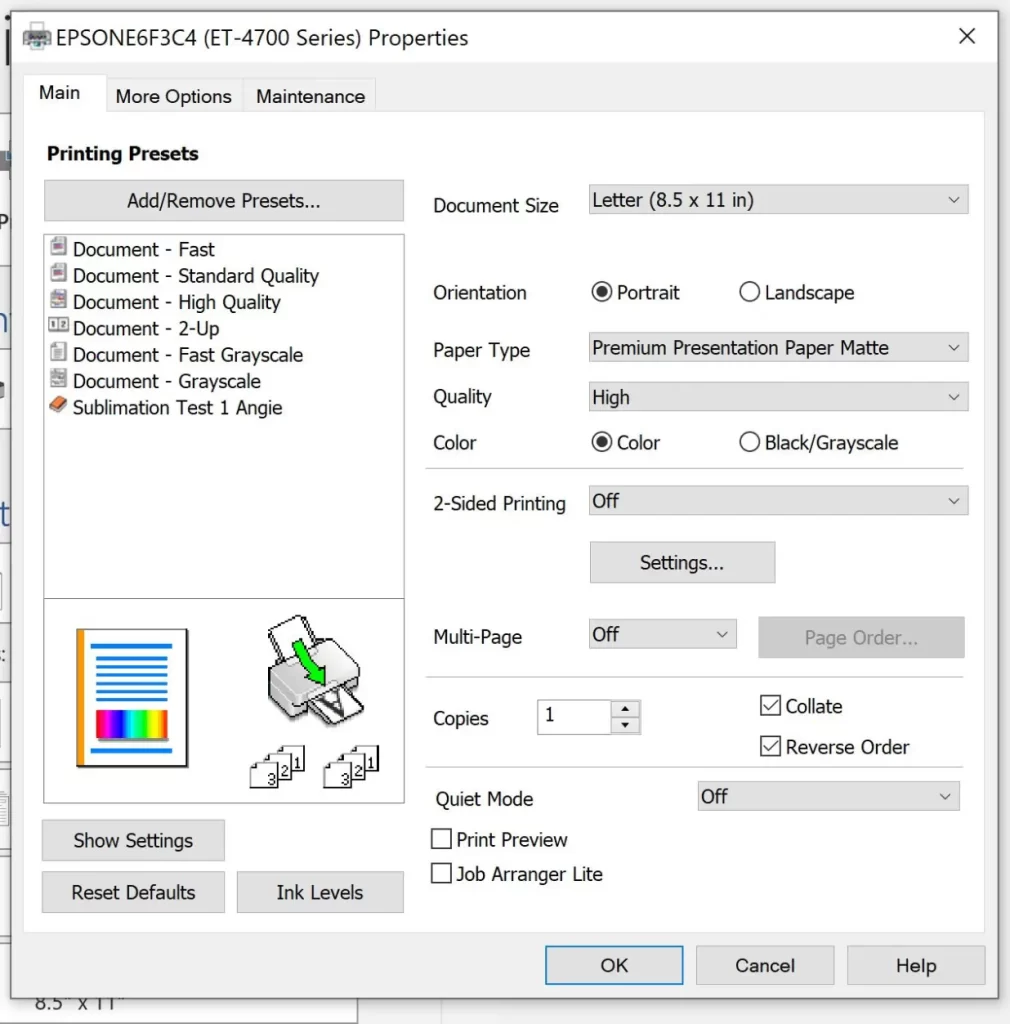
1. Printer Settings
Open the “Print” dialog in Word by clicking on “File” and then “Print” (or use the shortcut Ctrl+P).
Select your Epson printer from the list of available printers.
Click on the “Properties” or “Printer Properties” button to access the printer settings specific to your Epson printer.
2. Paper Type
Choose the appropriate paper type setting for sublimation printing. Look for options like “Transfer Paper” or “Specialty Paper.”
If there’s an option for “Print Quality” or “Media Type,” select “High Quality” or “Photo Quality.”
3. Print Quality
Set the print quality to the highest possible setting for optimal results. It is usually labeled as “High Quality” or “Best.”
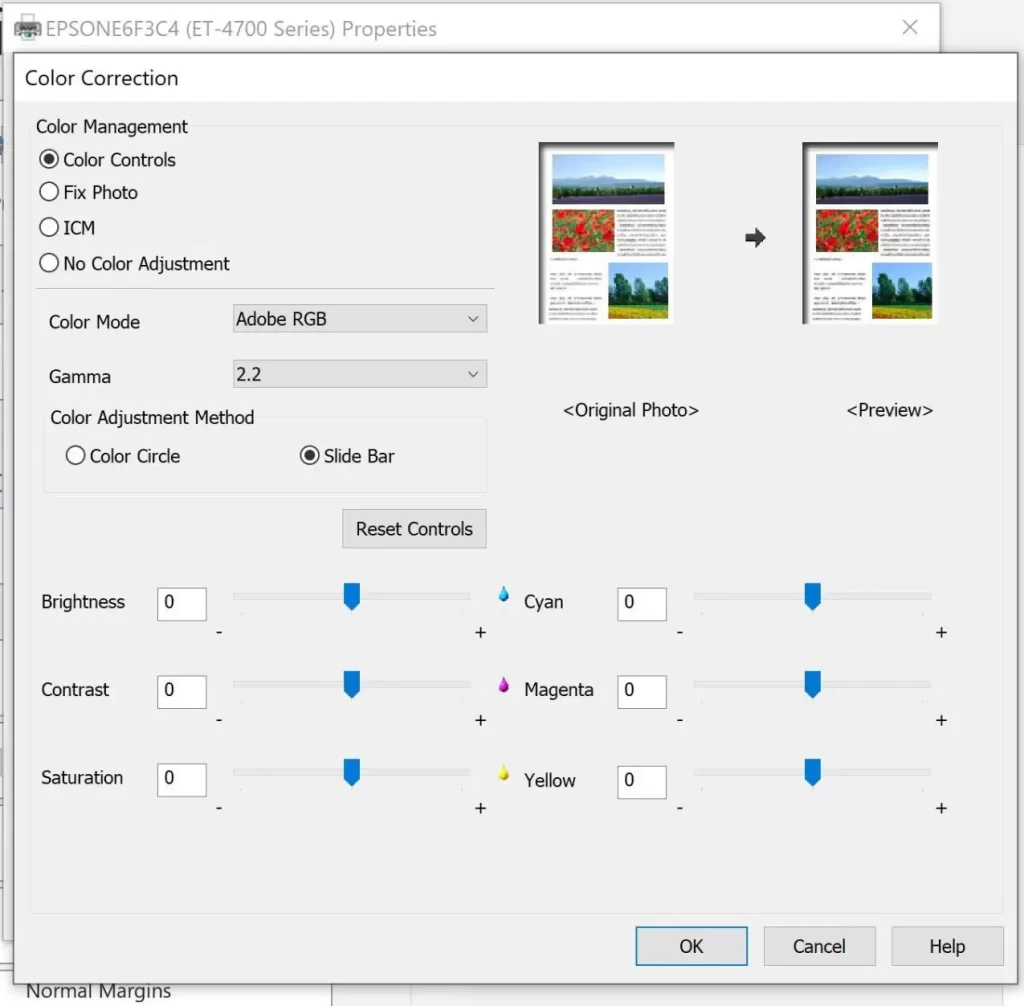
4. Color Management
Disable color management in the printer settings because sublimation printing requires color management to be handled by the software.
Look for an option like “Color Management” or “Color Options” and set it to “No Color Adjustment” or “None.”
Check for any additional settings related to ink usage, ink density, or image enhancement. Adjust these settings according to your preferences and the specific requirements of your sublimation printing process.
Once you have adjusted the settings, click “OK” to save the changes and return to the print settings window. Verify that the correct paper size is selected for your sublimation paper (e.g., Letter, A4, etc.).
Preview the document if available to ensure it appears as intended. Click the “Print” button to initiate the printing process.
Epson Printer Settings for Sublimation Printing in Adobe Photoshop
If you want to produce sublimation prints using Adobe Photoshop and your Epson printer, follow this detailed step-by-step guide to optimize your printer settings for sublimation printing:
“I am assuming that you already have installed Epson printer drivers and Adobe Photoshop software.”
1. Launch Adobe Photoshop on your computer and open the design file you want to print. Review the design to make any necessary adjustments before printing.
2. Before proceeding, check the image resolution. For high-quality prints, set the resolution to at least 300 dots per inch (DPI). To do this, go to the “Image” menu, select “Image Size,” and ensure that the resolution is set appropriately.
3. Next, adjust the image size to match the dimensions of your sublimation paper. Access the “Image Size” option under the “Image” menu and enter the desired dimensions while maintaining the original aspect ratio. This step ensures that your design fits perfectly on the sublimation paper.
4. Go to the “Edit” menu, select “Color Settings,” and choose the appropriate color space, such as Adobe RGB or sRGB, based on your workflow and intended output. This ensures consistent color representation across devices.
5. If available, install ICC profiles provided by the sublimation ink and paper manufacturer. These profiles act as a reference for color calibration, optimizing color accuracy for your specific printer, ink, and paper combination.
6. Access the print settings by going to the “File” menu and selecting “Print.” Choose your Epson printer from the available options. Review and adjust the paper type and size settings to match your sublimation paper specifications. Ensure the correct paper tray is selected if your printer has multiple trays.
7. Look for options like “High Quality” or “Photo Quality” and choose the appropriate setting based on your preferences and requirements.
8. Once you have reviewed all the settings, click the “Print” button to send your design to the Epson printer.
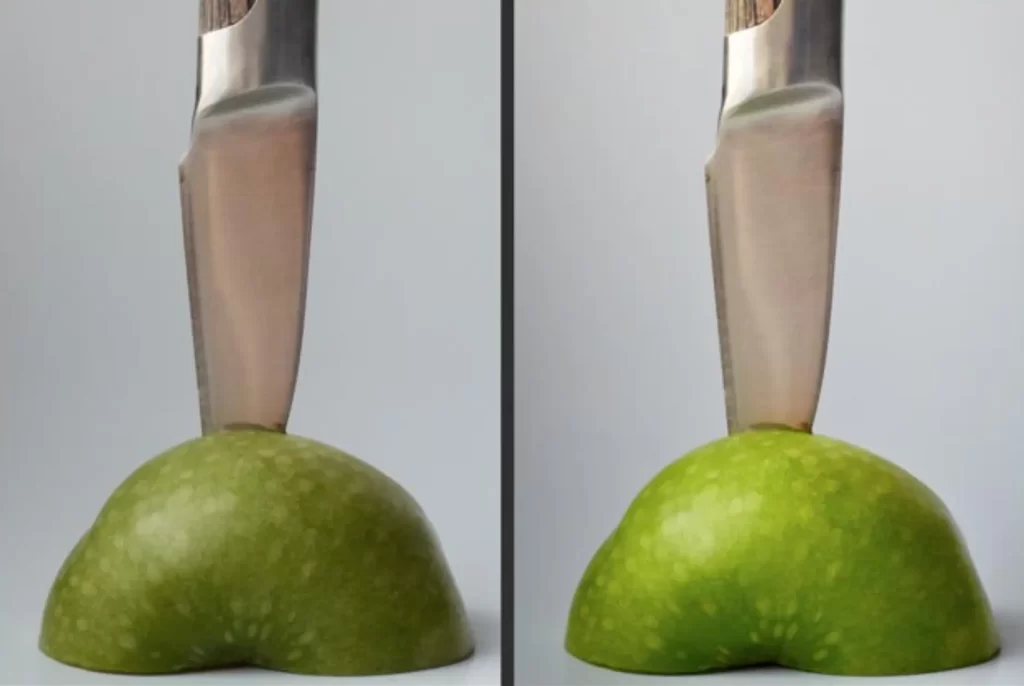
Why Do You Need Color Correction?
Color correction holds a significant role in bringing out the essence and beauty of your sublimation prints. It is the process of adjusting and fine-tuning the colors in an image to ensure they appear as intended.
It involves achieving accurate color balance, contrast, and saturation, allowing your prints to faithfully represent the original artwork or photograph.
The importance of color correction becomes particularly evident when it comes to sublimation printing using Epson printers. With sublimation, colors need to be vibrant and true to life to achieve stunning results. By utilizing the powerful Epson printer settings for sublimation, you can further enhance the color accuracy and vibrancy of your prints.
Color correction eliminates unwanted color casts, corrects white balance, and ensures consistent and natural skin tones. It enables you to showcase the intricacies of your designs, capturing the mood, emotion, and subtle nuances of the original artwork.
Moreover, accurate color reproduction is vital for maintaining brand integrity, especially for businesses that rely on consistent branding and accurate color representation.
Sublimation Printer Settings for MAC vs. PC
As someone who has had the opportunity to work with both MAC and PC systems for sublimation printing, I can shed light on the distinct considerations when it comes to printer settings. While the core functionalities remain similar, there are a few variations to be aware of.
For MAC users, accessing and adjusting Epson printer settings for sublimation is typically a smooth experience. The intuitive interface of MAC operating systems simplifies the process, allowing users to navigate through printer settings effortlessly.
MAC users can easily fine-tune settings such as paper size, print quality, and color management, ensuring optimal results with minimal hassle.
On the other hand, PC users may need to familiarize themselves with the printer driver software provided by Epson. These drivers enable PC users to access advanced printer settings and customization options.
While the initial setup may require a bit more configuration, PC users have the advantage of leveraging a wider range of settings and functionalities.
Conclusion
Indeed, optimizing Epson printer settings for sublimation is crucial to achieve the best results in your sublimation projects. By understanding and fine-tuning these settings, I have been able to elevate my sublimation prints brighter and sharper.
Through trial and error on Epson printers, I have explored the difficulty of color management, ink saturation, and print quality settings. Each adjustment has brought my designs to life in ways I never thought possible.
The satisfaction of seeing vibrant tones, sharp details, and accurate color reproduction in my sublimation prints is truly unparalleled. It has allowed me to create personalized gifts, unique apparel, and eye-catching home decor that leave a lasting impression.
Frequently Asked Questions
What settings do I put my Epson printer on for sublimation?
To optimize your Epson printer for sublimation printing, consider adjusting several settings. Select sublimation-specific paper size and type, set the print quality to the highest available option, manage color using ICC profiles, adjust ink density and saturation, and utilize soft proofing techniques for accurate color representation.
What setting should the printer be on for sublimation?
When setting up a printer for sublimation, select the highest print quality setting available, it’s mostly listed as “Best” or “Highest-quality”. This ensures sharpness, clarity, and optimal ink transfer during the sublimation process, resulting in vibrant and detailed prints.
What format is best for sublimation printing?
The best format for sublimation printing is typically JPEG (Joint Photographic Experts Group) or PNG (Portable Network Graphics). These formats support high-quality image compression without significant loss of detail.
How can I prevent ink clogging issues when using sublimation ink with my Epson printer?
To prevent ink clogging, it is crucial to maintain proper ink flow in your Epson printer. Regularly use your printer or perform print head cleaning cycles to keep the ink flowing smoothly. Avoid long periods of inactivity by printing at least once a week.
If you anticipate longer breaks, consider performing a complete cleaning cycle before and after the downtime. Additionally, ensure that you are using high-quality sublimation ink specifically formulated for your Epson printer model, as using incompatible or low-quality inks can increase the risk of clogging.
Can I use different paper sizes for sublimation printing on my Epson printer?
Yes, Epson printers allow flexibility in paper size for sublimation printing. Ensure your printer is compatible with the desired paper size, such as letter, legal, or tabloid. Adjust the paper size setting in the printer settings or driver software accordingly to match your chosen sublimation paper.
My passion for colors and customizing items has led me to sublimation printing. Not only do I personalize my belongings, but also run a profitable business. After the experience of over a decade - I am glad to share my reviews on best sublimation printers, ink and the right software (I use). Read the guides and contact if you need any help regarding dye-sublimation or heat press.