Have you ever wondered how to do sublimation printing at home? This handy technique allows you to transfer your own designs onto various products, such as shirts, mugs, tumblers, and more. Unlike other printing methods, sublimation printing creates vibrant, full-color, and permanent prints that won’t fade or crack over time.
In a nutshell, start by printing your design on sublimation paper using a sublimation printer and sublimation ink. The image is then transferred to a heat press machine where it is heated at a high temperature for a set amount of time. This causes the molecules in the dye to break down into a gaseous state and penetrate into the surface of the substrate where they re-form the design.
If you are itching to express your unique style and make a fashion statement, sublimation printing on shirts is the perfect approach. It’s a great way to design your t-shirts and show your personality and style. Before you start, first read what color shirts can you sublimate on.
Let’s see the process to create vibrant, custom shirts that will turn heads wherever you go!
Things Required
A sublimation printer
Sublimation transfer paper
Sublimation ink
A heat press
A sublimation-ready shirt (preferably polyester)
Heat-resistant tape
A lint roller
A scissor (optional)
Heat resistant paper
Step 1: Choosing the Right Shirt
To begin, select a shirt made from polyester or a polyester blend. These materials are ideal for sublimation printing as they have a higher ink absorption capacity, resulting in vibrant and long-lasting prints.
Look for shirts specifically labeled as “sublimation-ready” or “polyester for sublimation” to ensure optimal results.
Step 2: Designing Your Artwork
Let your creativity flow as you create or choose a design for your shirt. Whether you are using sublimation design software or sourcing existing designs, make sure to use high-resolution images. Adjust colors, add patterns, and incorporate your personal touch to bring your vision to life.
Remember, the key to a stunning sublimated shirt is an eye-catching design that captures attention and reflects your style.
Step 3: Printing Your Design
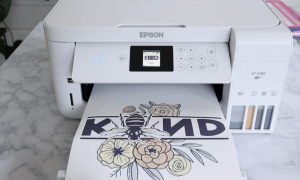
Load your sublimation ink cartridges into a compatible printer, ensuring they are aligned correctly. Transfer your design onto sublimation transfer paper using the mirror image setting. Trim the design if the paper is larger than the shirt.
This is crucial, as it ensures the final print appears correctly when transferred onto the shirt. Place the transfer paper face down on the shirt and secure it with heat-resistant tape to prevent any movement during the heat press process.
Ensure your shirt is clean and wrinkle-free. Use a heat press or iron to remove any creases, providing a smooth surface for the transfer. Also, remove any lint using a lint roller. Place the shirt onto a plate of heat press machine, and make sure it is properly aligned.
Insert a sheet of heat-resistant paper inside the shirt to prevent ink from bleeding onto the backside during the sublimation process.
Step 5: Preparing the Heat Press
Set your heat press temperature to 375°F (190°C) and the timer to approximately 45-60 seconds. Clean the surface of the heat press machine where you are going to place the shirt.
Preheat the heat press and apply pressure to remove any moisture or wrinkles from the shirt before applying for the transfer.
Note: these are the setting I use for sublimation on polyester t-shirts, I’d recommend reading the manufacturer’s guidelines for temperature and timing.
Step 6: Heat Press Application
After placing the shirt onto a plate of the heat press machine, align the transfer paper on it where you want the design to be printed. Make sure the design is facing down towards the shirt. Ensure even pressure distribution by using a Teflon sheet or silicone pad on top of the shirt.
Close the heat press and let it work its magic. The combination of heat and pressure will cause the sublimation ink to vaporize, penetrate the shirt fibers, and solidify into a vibrant, permanent print.
Step 7: Post-Printing Steps
Once the heat press process is complete, carefully remove the shirt from the heat press and peel off the transfer paper while it’s still warm.
Be cautious, as the shirt and transfer paper will be hot. Allow the shirt to cool completely before handling it further. And, if you want to pop the colors, learn the technique of making sublimation brighter and more vibrant.
Tips to Print Bright Images on Shirts
Use high-quality sublimation ink and sublimation transfer paper. This will ensure that your sublimation prints are vibrant and long-lasting.
Make sure that your image is the correct size for your shirt. If your image is too large, it will be distorted when it is printed onto the sublimation transfer paper.
Use a lint roller to remove any lint or dust from your shirt before you sublimate. This will help to ensure that your sublimation print is smooth and even.
Press the sublimation transfer paper and shirt for the correct amount of time. If you do not press the sublimation transfer paper and shirt for long enough, the ink will not be able to transfer properly. If you press the sublimation transfer paper and shirt for too long, the ink will start to bleed.
Remove the sublimation transfer paper from your shirt as soon as the heat press is turned off. If you leave the sublimation transfer paper on your shirt for too long, the ink will start to set and it will be more difficult to remove.
Video Guide for Beginners on How to Do Sublimation Printing on Shirts
In case you make a mess while transferring print, here’s how you can remove sublimation dyes.
How to Sublimate a Mug
Do you want to add a personal touch to your morning coffee routine or create unique gifts for loved ones? Sublimation printing on mugs is the perfect solution. You can sublimate on any type of mug, including ceramic, porcelain, and glass.
I’m thrilled to share my knowledge and guide you through the step by step process to print sublimation images on mugs:
Things Required
To sublimate on mugs, you will need the following supplies:
A sublimation printer
Sublimation transfer paper
Sublimation ink
A heat press machine for mugs
Clean sublimation mug
Heat resistant gloves
Heat resistant tape
Step 1: Selecting the Right Mug
Choose mugs specifically designed for sublimation printing. Opt for ceramic or polymer-coated mugs that have a smooth, white surface for optimal color reproduction.
Ensure the mug has a straight, cylindrical shape, as curved mugs can present challenges during the sublimation process.
Step 2: Designing Your Mug
Now it’s time to brainstorm your imagination and creativity. Draw a beautiful design that you want to print on the mug using graphic design software such as Adobe Photoshop or CorelDRAW, or browse through existing designs to create your desired look.
Keep in mind the dimensions and shape of the mug while designing. Make sure to choose a high-resolution design with sharp colors.
Step 3: Preparing Your Design for Sublimation
Once your design is ready, ensure it is in the correct format (typically JPEG or PNG) and adjust the size to fit the dimensions of the mug. Remember to mirror the image horizontally before printing, as sublimation transfers in reverse.
Step 4: Printing Your Design
Load the sublimation transfer paper into your printer. Print a test page to ensure the colors and details are accurate. Once satisfied, print the final design onto the transfer paper using sublimation ink. Handle the paper with care to avoid smudging or damaging the print.
Step 5: Prepping the Mug
Before applying the design, ensure the mug is clean and free from any dust or residue. Wipe the surface with a lint-free cloth or use a mild detergent to remove any dirt.
Do not skip this step – it is crucial to ensure proper ink transfer and adhesion.
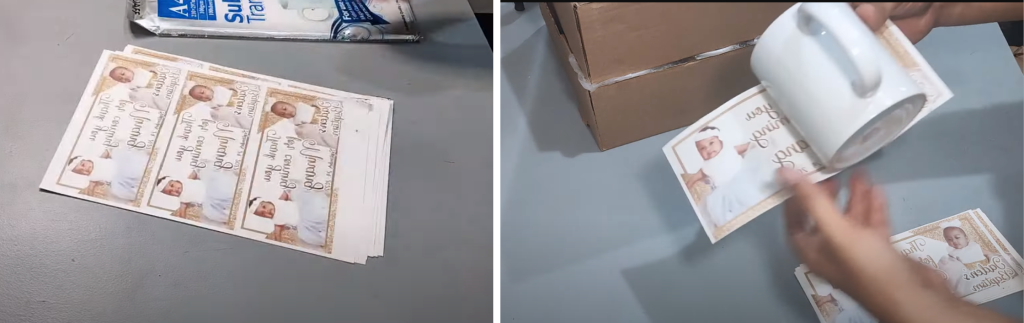
Step 6: Applying the Transfer
Cut the printed paper according to the size of the mug. Position the sublimation transfer paper with the printed side facing the mug. Carefully align and secure the paper onto the mug using heat-resistant tape to prevent shifting during the pressing process.
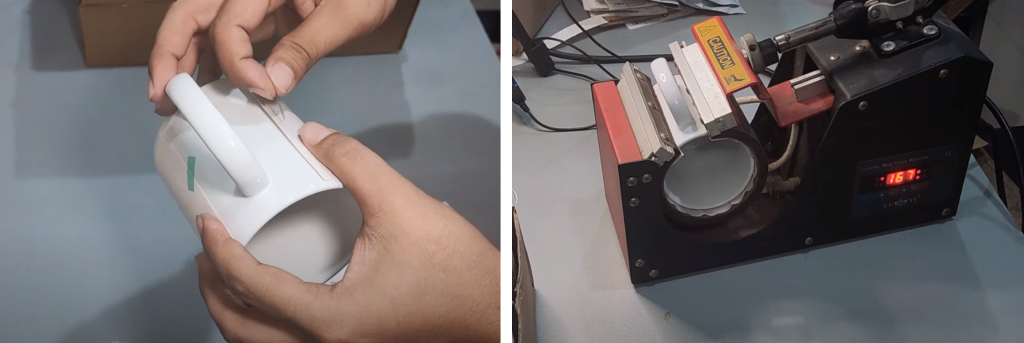
Step 7: Heat Press Application
Now it’s time to put on heat-resistant gloves. Set up your heat press temperature to 400°F (205°C) – it is recommended temperature for sublimation on mugs. For ceramic mugs, adjust the timer to approximately 3-4 minutes for sublimation.
Step 8: Heat Press Process
Once the heat press reaches the desired temperature, carefully place the mug with the transfer paper into the press. Ensure the pressure is evenly distributed. Close the heat press and start the timer.
The heat and pressure will cause the sublimation ink to transfer from the paper onto the mug, resulting in a vibrant and durable print.
Step 9: Cooling and Finishing
After the pressing time is complete, carefully lift the heat press and remove the mug. Be cautious as it will be hot. Place the mug on a heat-resistant surface and allow it to cool completely.
Once it’s slightly cooled, remove the transfer paper and throw it away. If needed, use a soft cloth to gently wipe off any excess residue.
For sublimation on Tumblers, you can follow the same process – but change the settings of the heat press machine to 400°F and apply pressure for 60 to 80 seconds.
Video Guide to do Sublimation on Mugs
Wrapping Up
Now you know how to do sublimation printing, start making custom t-shirts, mugs, mousepads, keychains, and other items that are usually difficult to print. The best part is that sublimation printers allow you to print literally any design – your imagination is the limit. Sublimation transfer is a cost-efficient way to print business logos for branding.
In order to get the best results, it’s important to follow the tips listed above. Make sure to use high-quality sublimation paper and set the correct print settings on the sublimation printer. Preheat the substrate before printing and apply even pressure with the heat press.
Do not forget to cool the item completely before handling/packing. With a little practice, you will be able to create beautiful prints using sublimation printing.
Frequently Asked Questions
How do I start sublimation printing?
In order to start sublimation printing, you will need a sublimation printer, sublimation paper, heat press and products you want to sublimate. First, install the appropriate driver software and create a print queue. You will also need to set the correct print settings for your printer. Once the image is ready, you can print it onto sublimation paper by applying appropriate heat and pressure for a certain time using a heat press machine.
What is needed for sublimation printing at home?
In order to do sublimation printing at home, you will need a sublimation printer, sublimation paper, and a heat press.
Can you print sublimation with a regular printer?
No, you cannot use a regular printer to print sublimation. Sublimation printers are specifically designed for printing images onto sublimation paper. You will not be able to get the same results with a regular printer.
What equipment do you need for sublimation printing?
You need the following equipment for sublimation printing;
My passion for colors and customizing items has led me to sublimation printing. Not only do I personalize my belongings, but also run a profitable business. After the experience of over a decade - I am glad to share my reviews on best sublimation printers, ink and the right software (I use). Read the guides and contact if you need any help regarding dye-sublimation or heat press.

 Load your sublimation ink cartridges into a compatible printer, ensuring they are aligned correctly. Transfer your design onto sublimation transfer paper using the mirror image setting. Trim the design if the paper is larger than the shirt.
 Set your heat press temperature to 375°F (190°C) and the timer to approximately 45-60 seconds. Clean the surface of the heat press machine where you are going to place the shirt.
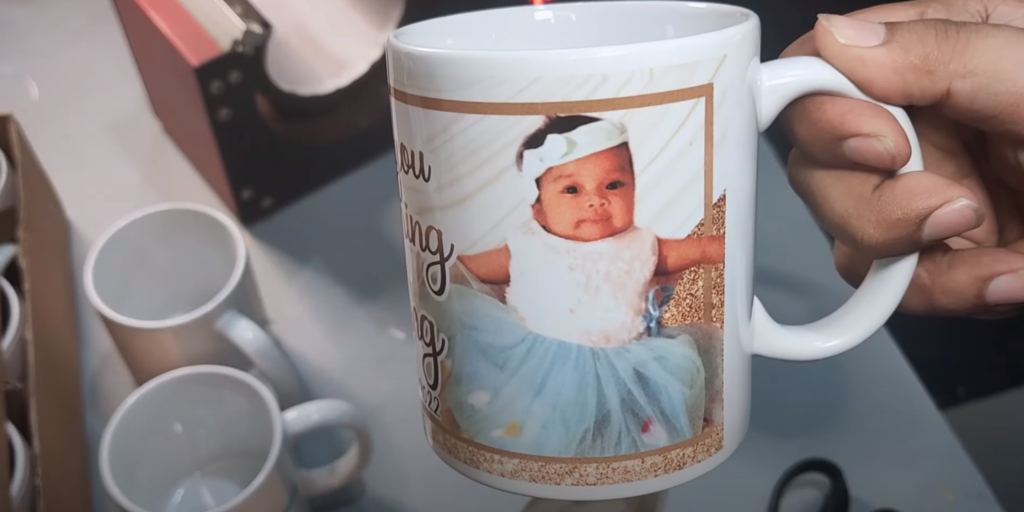


My problem how to flip my design with fonts so they will read right when I print on shirt??
Design your art in a way that fonts are flipped horizontally.