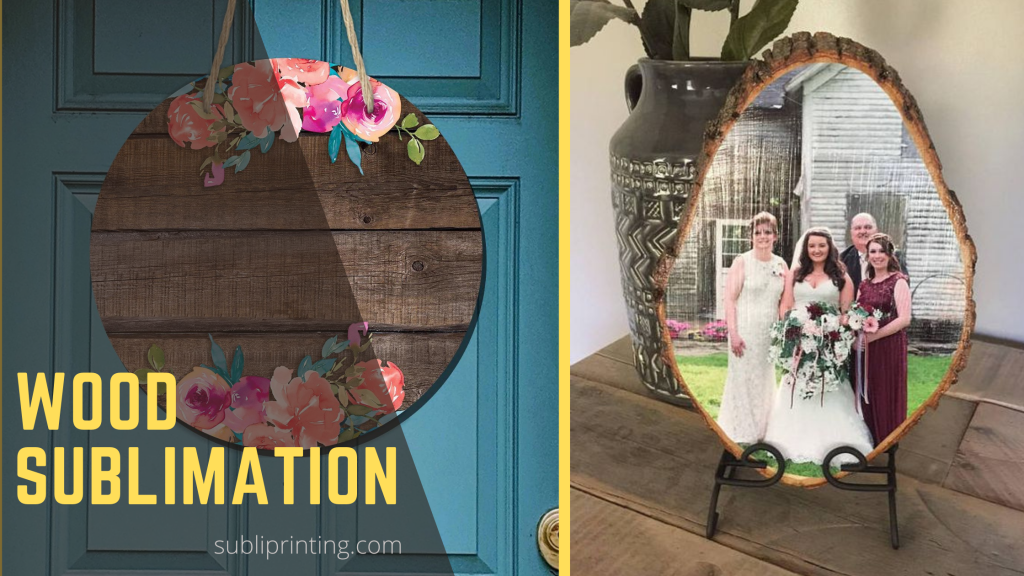
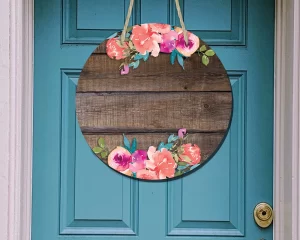
I’ve always been a fan of wood crafts, but I never thought I could create something truly unique until I learned about wood sublimation. With sublimation on wood, you can create custom wood signs, coasters, photo frames, trays, wall hangings, and more.
I’ve been experimenting with sublimation on wood for a few months now, and I’ve learned a lot along the way. Here, I’ll share my personal experience with how to sublimate on wood, including the best methods, tips, and tricks. I’ll also share some of my own projects, so you can see what’s possible.
Wood sublimation is the process of transferring high-resolution, full-color designs to wood blanks using heat and pressure, creating visually striking and long-lasting results.
The image is printed on a sublimation paper that using sublimation ink. When the paper is placed on the wood and heat is applied, the ink vaporizes and is absorbed into the wood fibers.
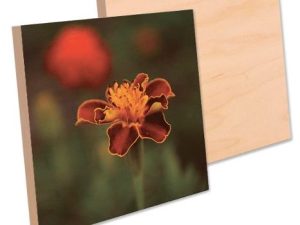
The porous nature of wood allows the ink to penetrate the surface, resulting in a stunning, natural-looking finish that preserves the texture and character of the wood itself.
Whether it’s photographs, illustrations, or custom patterns, sublimation on wood offers endless possibilities for creating personalized gifts, home décor, ornaments, and artistic pieces.
Things to Consider Before Sublimating a Wood Slice
There are a few things and tips to keep in mind while doing wood sublimation:
1. Wood Slice Quality
The quality of the wood plays a vital role in the outcome of your sublimation project. Opt for high-quality wood slices that are smooth, even, and free from major imperfections or cracks.
This will provide a solid and consistent surface for the sublimation process and result in a professional-looking final product.
2. Wood Type
Different wood types have varying characteristics, such as grain patterns and porosity, which can impact the sublimation process.
Hardwoods, such as maple and oak, tend to work better than softwoods, such as pine. This is because hardwoods have a smoother surface and tighter grain structure, which makes it more difficult for the ink to bleed.
3. Color of the Wood
Lighter woods will show the image better than darker woods, whether it is a coated or uncoated wood. This is because the ink will be more vibrant against a lighter background.
4. The Thickness of the Wood Slice
The thickness of the wood slice will affect the amount of time that you need to press the image. Thicker wood slices will require more time to press.
5. Surface Preparation
Proper surface preparation is crucial for achieving desirable sublimation results. Begin by sanding the wood slice to create a smooth and even surface. Remove any rough patches, blemishes, or dirt, and ensure that the wood is clean and dry before proceeding.
6. Coating
If the wood you have chosen is not sublimation ready, consider applying a coating to the wood surface before sublimation.
Some wood slices may benefit from a pre-treatment, such as a clear polymer, polyurethane, or sublimation coating, to enhance ink absorption and protect the design from scratches or fading.
I personally prefer NGOODIEZ sublimation coating, along with providing a layer for perfect sublimation, it also helps resist scratches and abrasion. Plus, I experienced brighter and long-lasting prints on wood after applying this coating.
7. Design Considerations
Keep in mind that the natural texture and grain of the wood will interact with your design during the sublimation process. The wood’s grain will show through the design, adding a unique and rustic charm.
When selecting or creating your design, consider how it will complement and interact with the wood’s natural characteristics to achieve the desired aesthetic appeal.
8. Temperature and Pressure
Understanding the optimal temperature and pressure settings for the sublimation process is crucial. The ideal temperature for sublimating on wood is 380-400 degrees Fahrenheit. The pressure should be set to medium-high.
Applying the right amount of pressure ensures proper ink penetration into the wood fibers, resulting in a durable and long-lasting sublimated image.
Ever since I stumbled upon the technique of wood sublimation, I’ve been fascinated by its ability to transform ordinary wooden surfaces into stunning works of art.
With a deep passion for woodworking and a desire to infuse my creations with personalized designs, I have mastered the art of sublimating wood.
Let me take you through my personal experience and share the step-by-step process that led to great wood sublimation results.
Supplies Needed to Sublimate on Wood:
A wooden substrate to be printed
Sublimation printer
Sublimation paper
Lamination paper
Heat press machine
Sublimation Ink (Recommended: Hobby Lobby)
Foam brush
Sublimation coating
Sealer
Scissor
Heat resistant tape
Paper chart
A detailed guide to do sublimation on uncoated wood blanks, you can use the same method for sublimation on wood signs, slices, ornaments, and other blanks.
Step 1: Wood Preparation for Sublimation
It all starts with selecting the perfect wood blank or pre-finished wooden product for sublimation. I discovered that using a specially coated wood surface enhances the final outcome.
However, if you are using regular wood that has not been prepared for sublimation, its surface should be smooth and free of any dirt or debris. You may want to sand it lightly to create a smooth surface.
For best results, I carefully sourced high-quality wooden blanks with a polymer-based coating, ensuring a smooth and receptive canvas for the sublimation transfer.
Step 2: Design Selection
With my wood blanks in hand, the next step was to choose the design I wanted to transfer onto the wood. This was the exciting part!
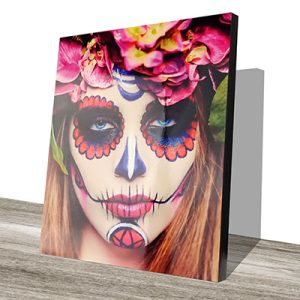
I experimented with various options, from cherished photographs and complex artwork to custom logos and meaningful quotes. The possibilities seemed endless – it was a vibrant photograph of a breathtaking landscape, filled up with striking colors.
Step 3: Printing
With my design ready, I printed it onto the heat-press transfer paper using the dedicated sublimation inks. It was essential to use the right sublimation inks to achieve vibrant colors and ensure longevity.
Trim the transfer paper to fit the size of the wood you want to print on. I found that selecting the correct color profiles and optimizing image resolution was crucial for producing stunning prints.
Step 4: Alignment
Once the design was printed, I carefully positioned the transfer paper face-down onto the prepared wood surface. Don’t stress out if you feel misalignment over the first attempt – it is a skill that you’ll learn over time.
I then secured the wood and transfer paper between protective sheets to prevent any unwanted transfer or heat press damage. Cut the lamination paper to the size of the wood substrate and place it on top.
Step 5: Pressing and Heat Application
Now it’s time to do the heat press magic. Set up your heat press machine’s temperature around 380 to 400 degrees Fahrenheit (193 to 204 degrees Celsius), place a paper chart on top and apply the pressure for the recommended duration, typically 50 to 60 seconds.
Do not leave the press for longer than a minute as it will affect the vibrance of ink colors. As the heat press releases its grip, carefully lift the transfer paper to unveil your masterpiece.
Step 6: Finishing Touches
Once you have successfully done sublimation on wood, it’s time to apply any finishing touches required.
To ensure the longevity and beauty of the sublimated image, I apply a protective coating over the wood, like a sealer or lacquer. This safeguarded the print from scratches, fading, and the test of time, ensuring its beauty would endure for years to come.
You can also apply Polyacrylic Coating once the wood slice has been cooled down, it will protect and enhance the sublimated design. Ensure you are working in a well-ventilated area. Using a brush or foam applicator, apply a thin, even coat of polyacrylic onto the entire surface of the wood slice, including the sublimated design.
I found that experimenting with different finishes allowed me to achieve a range of effects, from a glossy sheen to a subtle matte texture.
Video Tutorial on How to Do Sublimation On Wood
How to Sublimate On Painted Wood?
To sublimate on painted wood, make sure the paint is completely dry before printing, and you will need to first seal the wood with a sealant or lacquer. This will help to prevent the ink from bleeding.
Also, ensure that the paint used is heat-resistant and compatible with the sublimation process.
Once the sealant or lacquer has dried, you can print your design onto transfer paper and then transfer it to the wood (see the method above).
After printing your design on painted wood, again apply a protective clear coat or sealant to enhance durability and preserve the design’s integrity.
Best Designs to Sublimate on Wood
Here are a few ideas for designs you can print on wood:
A simple geometric design
A floral design
Nature-inspired artwork
A quote or phrase
A family photograph
Your favorite song lyrics or a poem
Vintage and retro art
A logo or monogram
The possibilities are endless! With a little bit of creativity, you can create beautiful, customized wood prints that will add personality to any room.
Sublimation on Painted Wood vs Unpainted Wood
Sublimation on painted wood and unpainted wood offer different artistic possibilities, each with its own set of characteristics, advantages, and considerations. Let’s compare both to see the differences:
1. Color Vibrancy
When sublimating on painted wood, the use of a solid base coat creates a consistent and uniform background, allowing colors to appear more vibrant and saturated. The filmy nature of the paint prevents the wood grain from showing through, resulting in sharper and more intense hues.
On the other hand, sublimating on unpainted wood allows the natural wood color and grain to influence the final appearance. The ink fuses with the wood fibers, producing a more subdued and rustic color palette, where the wood grain contributes to the overall aesthetic.
2. Background Consistency
Sublimating on painted wood ensures a smooth and consistent background, as the paint layer provides a solid surface for the design. This uniformity allows intricate designs with precise lines, fine details, and typography to stand out prominently.
Sublimating on unpainted wood, on the other hand, embraces the natural texture and grain of the wood, creating a unique and organic backdrop for the sublimated design. The wood’s natural characteristics add depth, complexity, and a touch of rustic charm to the final artwork.
3. Design Options
Painted wood opens up a wide array of design possibilities. The solid base coat enables the creation of complex designs with sharp lines and detailed patterns. It provides a contemporary and polished canvas for various artistic styles.
Unpainted wood is well-suited for designs that blend with nature or embrace a more rustic aesthetic. The wood grain becomes an integral part of the artwork to create a unique composition.
4. Surface Preparation
Sublimation on painted wood requires an additional step of applying a suitable base coat before the sublimation process.
On the other hand, sublimation on unpainted wood eliminates the need for surface preparation, as the natural wood surface is ready to receive the sublimation ink. However, applying a sublimation coating is better for brighter results.
5. Artistic Aesthetics
The choice between sublimating on painted or unpainted wood ultimately depends on the desired artistic aesthetic.
White-painted wood offers a vibrant look, with designs popping against the solid background. It is well-suited for bold and modern designs.
Unpainted wood, with its rustic and organic appeal, is ideal for designs that embrace nature or seek a timeless and natural aesthetic.
Can You Sublimate On Wood Cutting Board?
As an expert in the field of sublimation, I advise caution when considering sublimating on a wood cutting board. While sublimation can produce vibrant and long-lasting designs on wood, sublimating on a wood cutting board poses specific challenges and considerations.
Wood cutting boards are often treated with food-safe finishes, such as oils or sealants, to protect the wood and prevent contamination. These finishes create a barrier that can slow down the sublimation process.
The presence of oils can prevent the sublimation ink from fully penetrating the wood fibers, resulting in a less vibrant and less durable design.
Additionally, cutting boards are subjected to regular use, washing, and cutting, which can lead to wear and tear over time. The constant exposure to moisture, heat, and friction can cause the sublimated design to fade, peel, or deteriorate more quickly compared to other wood surfaces that are not subjected to such harsh conditions.
If you still wish to sublimate on a wood cutting board, it is crucial to select a board that is specifically designed and marketed for sublimation. These boards are typically made from untreated or food-safe coated wood surfaces that are optimized for successful sublimation results.
Using a designated sublimation cutting board ensures that the ink bonds properly and withstands the rigors of regular kitchen use.
Wrapping Up
Indeed sublimation is a great way to create beautiful and unique projects on wood. With our tested pro tips and best methods, you now have the knowledge and expertise to confidently sublimate on wood.
However, you should sublimate on wood blanks and ornaments that you do not intend to place in a dishwasher. If your sublimated wood item is going to be exposed to water, it is best to use a heat transfer process instead.
Whether you choose painted or unpainted wood, embrace the artistry of sublimation on wood to unlock your creative potential and create captivating designs.
Frequently Asked Questions
Can wood be sublimated?
Yes, wood can be sublimated. The type of wood you use will affect the results, so choose uncoated wood if you want a more vibrant print. Make sure the wood is sealed with a sealant or lacquer before printing to prevent the ink from bleeding.
What kind of wood can you sublimate on?
The best type of wood to sublimate on is uncoated wood. If you want to print on painted wood, make sure the paint is completely dry before printing and seal the wood with a sealant or lacquer. You can also sublimate on wood blanks.
At what temperature does wood sublimate?
The recommended temperature to sublimate on wood is 370 degrees for 90 seconds. If you are using a laser printer, the recommended temperature is 400 degrees for 60 seconds.
Can you print designs directly onto wood?
Yes, you can print designs directly onto wood using a laser printer. The type of wood you use will affect the results, so choose uncoated wood if you want a more vibrant print. Make sure the wood is sealed with a sealant or lacquer before printing to prevent the ink from bleeding.
My passion for colors and customizing items has led me to sublimation printing. Not only do I personalize my belongings, but also run a profitable business. After the experience of over a decade - I am glad to share my reviews on best sublimation printers, ink and the right software (I use). Read the guides and contact if you need any help regarding dye-sublimation or heat press.

 To sublimate on painted wood, make sure the paint is completely dry before printing, and you will need to first seal the wood with a sealant or lacquer. This will help to prevent the ink from bleeding.
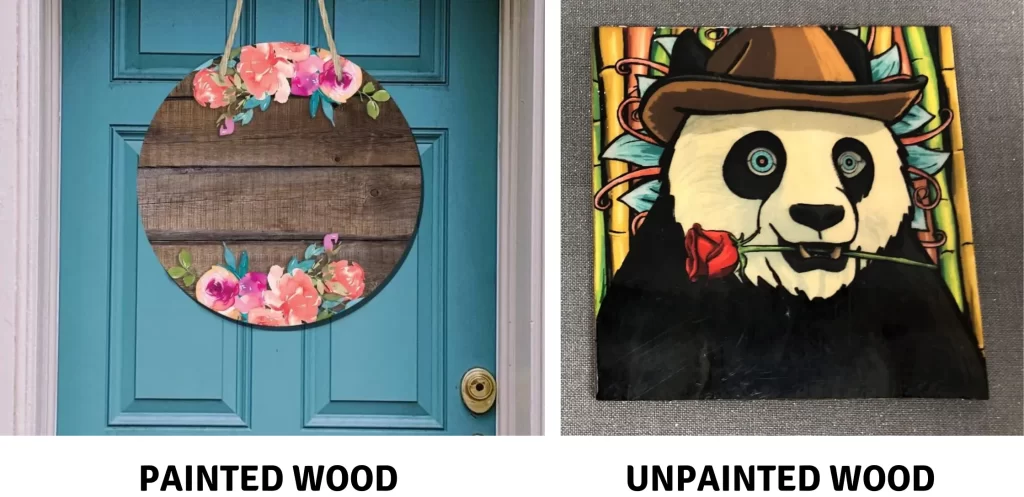


")

